Translate Movie’s Subtitle using ChatGPT

For this process we will use OpenAI API with GPT 3.5+turbo model.

The steps are pretty simple:

  1. Obtain the subtitle/soft-subs.
  2. Take a bunch of lines, with approx 100 word, just for safe with token limits.
  3. Feed them with proper prompt,
  4. Parse the answer or response to respective source lines.

Obtain the Subtitle

Subtitle file is .ass/.ssa extracted from downloaded .mkv file using ffmpeg for example:

$ ffmpeg -i "Movie.mkv" -vn -an "Movie.ass"

Take a bunch of lines

I am using go to extract to subtitle with go-astisub. This bunch of lines should be formatted which each lines will become "<number>. {<ass-codes>} <text>". Why? Because we need to preserve the text format (eg. bold, coloring, etc.) and keep the translated output with its sequence and map to its source.

Prompting Properly

Here is an example for the prompt with closes by a marker <Dialog>:

Translate following dialog from English to Indonesia. Please keep the line number and keep everything in curly braces.

<Dialog>

Then we append with the contents from bunch of lines with proper format, eg.:

1. {time=1, bold, red} This story is only fiction.
2. {time=10, italic} Don't mind whatever it tells.
3. {time=20, black} It will make you suffer and hard to sleep.

In golang we can use go-openai and calculate the cost of tokens with tiktoken-go.

llmclient := openai.NewClient(os.Getenv("OPENAI_API_KEY"))

req := openai.ChatCompletionRequest{
		Model:       openai.GPT3Dot5Turbo,
		Temperature: 1,
		TopP:        1,
		//MaxTokens: 20,
		Messages: []openai.ChatCompletionMessage{
			{
				Role:    openai.ChatMessageRoleUser,
				Content: prompts,
			},
		},
		Stream: true,
}

stream, err := llmclient.CreateChatCompletionStream(ctx, req)

Parse the Answer

With the output like this:

<Dialog>
1. {time=1, bold, red} Cerita ini hanya fiksi.
2. {time=10, italic} Jangan pedulikan apa pun yang diceritakan.
3. {time=20, black} Ini akan membuatmu menderita dan sulit tidur.

Just parse each lines and map the line number to corresponding source to create the translated output.

Happy coding !!!

Create DAW – Day 2

After tinkering with the GUI (on Day 1), the next step to do is find a way how to read and write MIDI files and send it to MIDI out devices. Handling MIDI files is available using jdksmidi library. Additionally It allows connect to MIDI device. On its experimental3 branch the author refactor the library to utilize RtMidi when communication to MIDI out device.

Next step is to simulate the player or MIDI sequencer. Fortunately jdksmidi provide an example to create the sequencer. I add new option on test_sequencer to use RtMidi. On Windows it works flawlessly using Microsoft GS Wavetable and OmniMIDI as virtual MIDI out devices.

The challenging part creating sequencer is to send MIDI event at realtime from PC to the MIDI out devices. There were two options to use a timer to do “near” real-time. First using Audio stream as timer and second using high-precision or Multimedia Timer.

  • For Audio stream timer duration depend on the audio buffer length when to send current MIDI events. Usually the audio driver will call our callback to fill its audio buffer.
  • For high-precision time we can wait or sleep using “reasonable” small interval eg. 10ms each to send MIDI events from past interval to current. The implementation on cross-platform C++ is using std::this_thread::sleep_for.

For platform that doesn’t have virtual MIDI such as MacOS or Linux there were other options such FluidSynth, BASSMIDI, or TinySoundFont (tsf).

  • I’am starting with BASSMIDI since it is production ready, good quality, simple and has mature API. The limitation is its closed-source and the type of its license if the project want to go commercial, but on the early stage it is very helpful as long as its free.
  • FluidSynth is worth to try but for this project it is overkill and depend on several linux libraries. It is open source and could be source of insiprations and benchmark.
  • At the end of the day, I met TinySoundFont, the header-only library, small and open-source software wavetable synthesizer.

TinySoundFont rendered output is acceptable with small issues:

  • Some preset/instrument played with very low volume.
  • Additional sampling or interpolating algorithm to improve render quality.
  • Optionally: moulation, reverb, chorus DSP effect.

But dont worry, be happy. Since its open-source we can do the experiment to tackle this with our favour.

PSP Emulator Inside Part-3

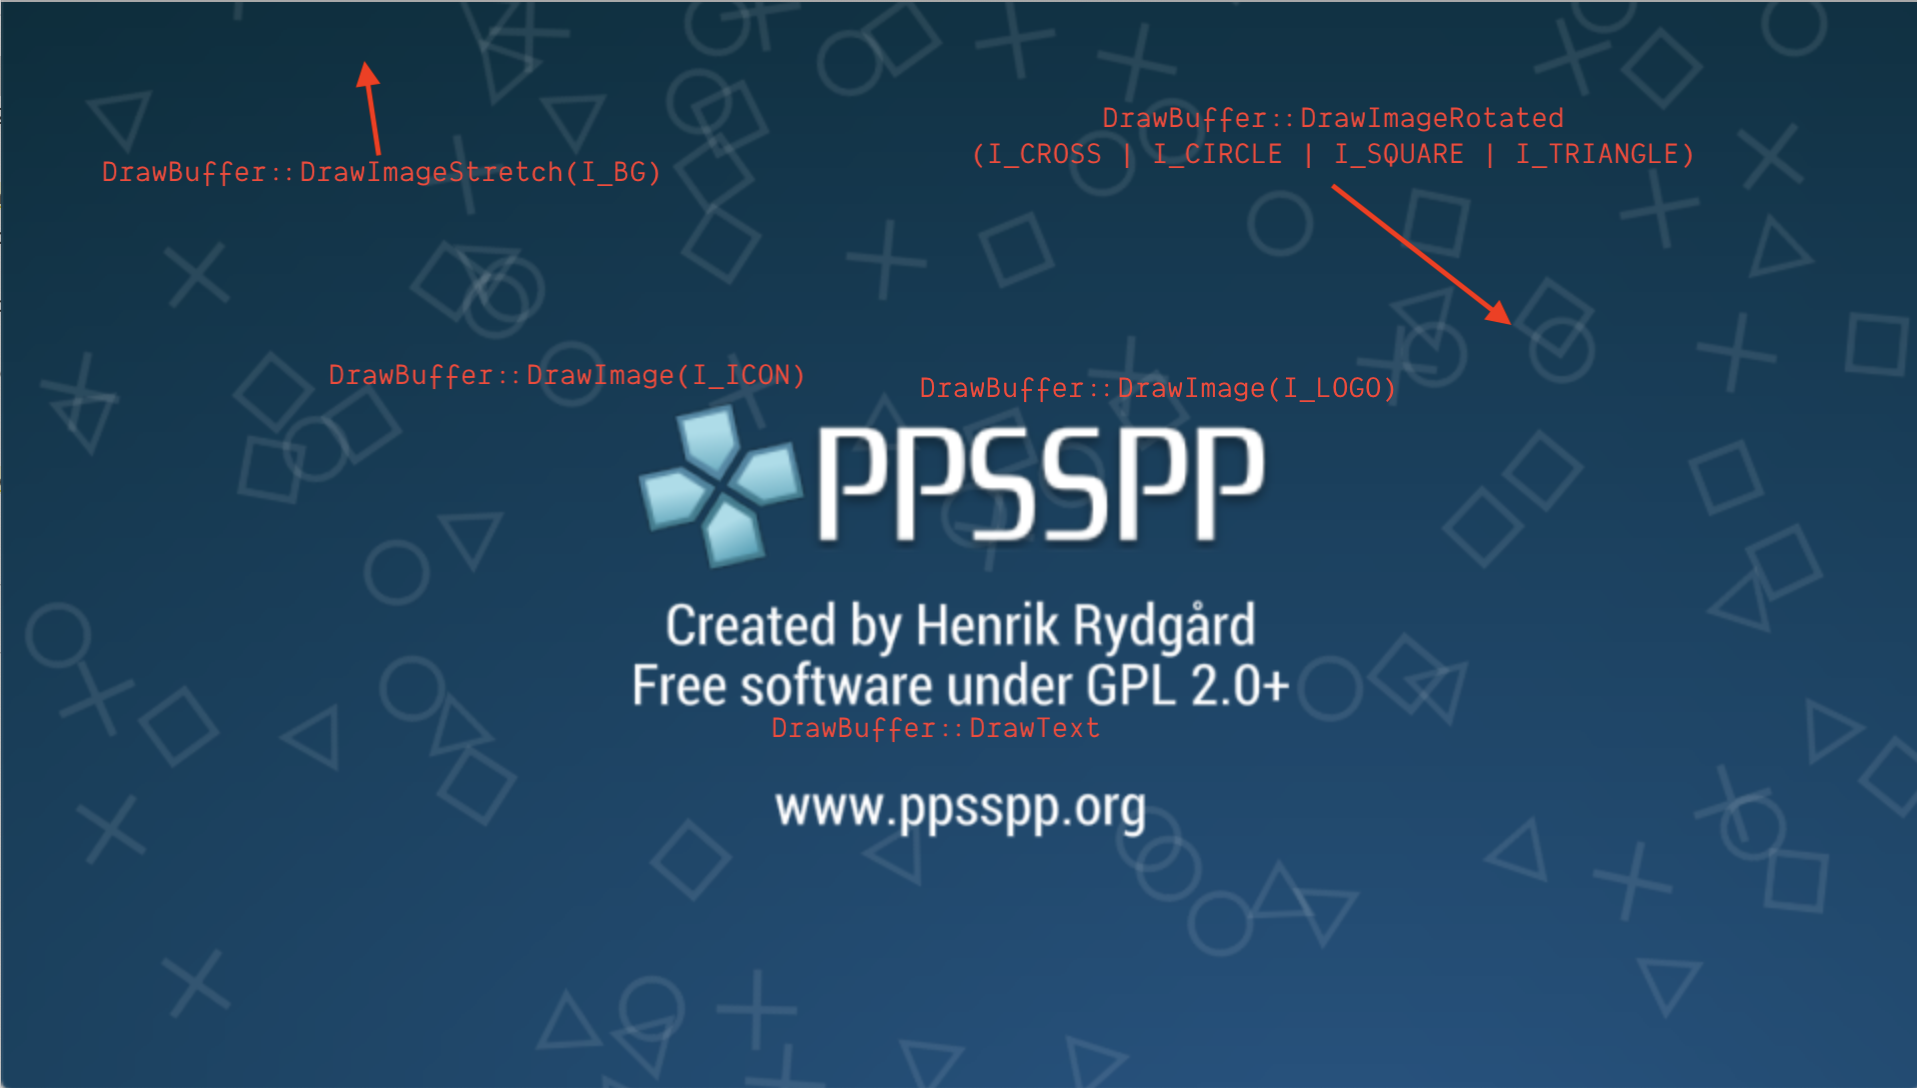
In this part we will see abstract class Screen [ext/native/ui/screen.h] as an activity unit of emulator. ScreenManager will point to a Screen that will be shown and forward user input to be interacted to. PPSSPP will start with LogoScreen. PPSSPP has some Screens in regards to the state of emulator. The Screen’s method that related the flow Screen are:

  1. touch | key | axis
  2. sendMessage
  3. update
  4. render
  5. resized

For simplicity, the transition of Screen like this: LogoScreen –> MainScreen –> EmuScreen.

LogoScreen < UIScreen

Located: [UI/MiscScreen.h]

  1. touch or key: will do next transition to MainScreen
  2. update:
    1. CreateViews
    2. UpdateViewHierarchy
    3. after 60 seconds will do next transition to MainScreen
  3. sendMessage:
    1. boot: transition to EmuScreen
  4. render
    1. DrawBackground

Screen Shot 2020-05-20 at 15.58.23

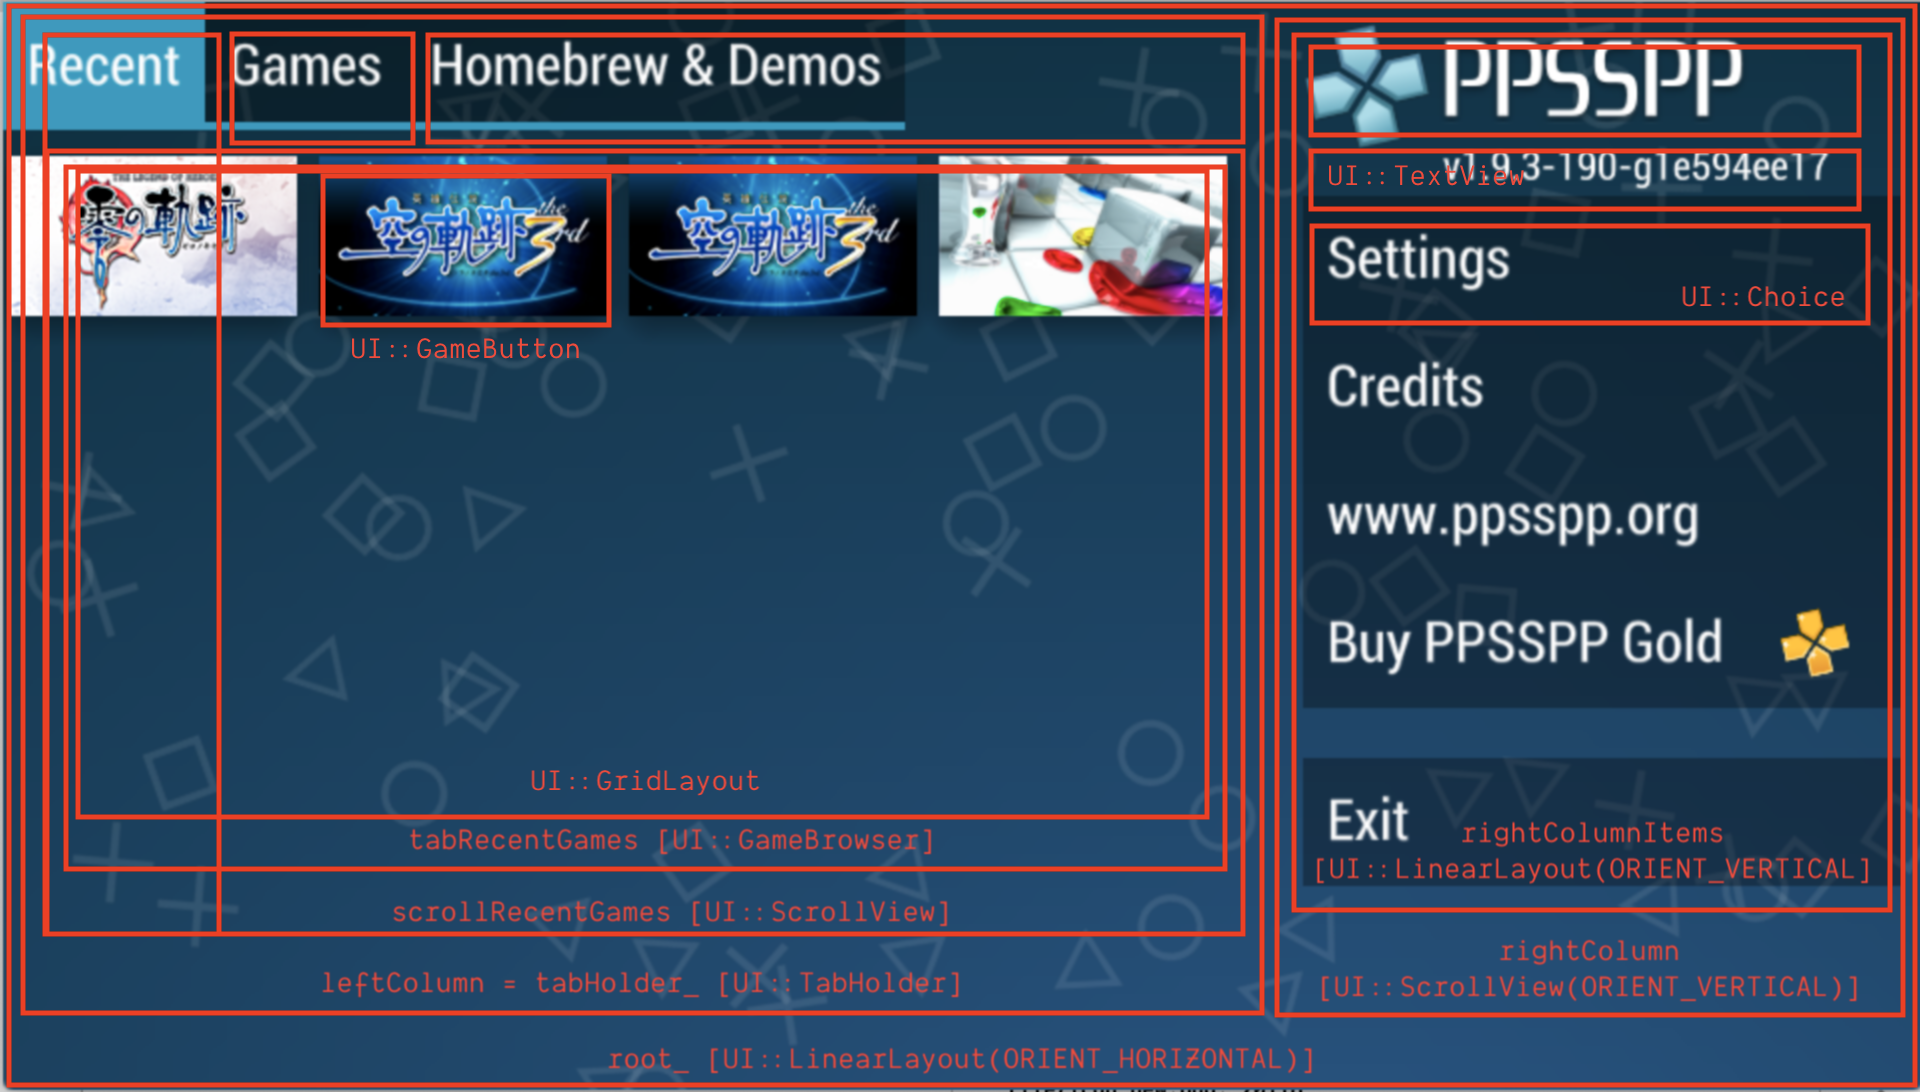
MainScreen < UIScreenWithBackground

Located: [UI/MainScreen.cpp]

Screen Shot 2020-05-20 at 16.20.00

  1. update
    1. CreateViews if need recreate
    2. UI::UpdateViewHierarchy
      1. UI::DispatchEvents [ext/native/ui/view.cpp]
  2. render
    1. CreateViews
      1. new GameBrowser
        1. GameBrowser::Refresh
    2. UI::ViewGroup::Draw
      1. GameBrowser::Draw
        1. GameButton::Draw
  3. sendMessage
    1. boot: transition to EmuScreen
    2. browse_folderSelect

When clicking the GameButton then flow be:

  1. SDL_MOUSEBUTTONDOWN
  2. NativeTouch
  3. ScreenManager::Touch
  4. (top)Screen::Touch = MainScreen::Touch = UIScreen::Touch
  5. UI::TouchEvent
  6. MainScreen::root_ (UI::ViewGroup) ::Touch
  7. down into sub views_ to reach GameButton::Touch
  8. UI::Clickable::Touch: check TOUCH_UP and x, y in bounds
  9. UI::Clickable::Click
  10. UI::Event (GameButton.OnClick)::Trigger
  11. UI::EventTriggered (OnClick,  [ext/native/ui/view.cpp]: push

    DispatchQueueItem(UI::Event (GameButton.OnClick), UI::EventParams) into dispatchQueue

When update calling it will dispatch event from dispatchQueue and the UI::Event (OnClick)::Handle will be executed:

GameButton::OnClick.Handle(this, &GameBrowser::GameButtonClick)

Then GameBrowser.OnChoice will be triggered with UI::EventParams with clicked GameButton::GamePath info. When the dispatchQueue next processed then UI::Event (OnChoice)::Handle will be executed:

GameBrowser::OnChoice.Handle(this, &MainScreen::OnGameSelectedInstant)

Then the Screen will transition into EmuScreen with GamePath.

EmuScreen < UIScreen

Located: [UI/EmuScreen.cpp]

  1. new EmuScreen
    1. set bootPending_ TRUE
    2. set gamePath_
  2. update with bootPending_ TRUE
    1. bootGame with gamePath_
      1. SetBackgroundAudioGame [UI/BackgroundAudio.cpp]
      2. bootAllowStorage
      3. GameInfoCache::GetInfo [UI/GameInfoCache.cpp]
      4. set CoreParameter
      5. PSP_InitStart [Core/System.cpp]:

PSP Emulator Inside Part-4

For opcode CPU disassembly, how to compile as JIT, and interpreter implementation, describe on: Core/MIPS/MIPSTables.cpp . The MIPSInterpret_RunUntil will run the cpu execution unit, from fetch -> decode -> and execute (MIPSInterpret) if cpu core CPUCore::INTERPRETER

The call flow for MIPSInterpret_RunUntil:

  1. MIPSState::RunLoopUntil
  2. PSP_RunLoopUntil / PSP_RunLoopFor
    skip if core state CORE_POWERDOWN, CORE_BOOT_ERROR, or CORE_RUNTIME_ERROR.
    for CORE_STEPPING execution thru MIPS_SingleStep
  3. PSP_RunLoopWhileState
    continue if core state CORE_RUNNING, or CORE_STEPPING.
  4. EmuScreen::render